Raw Brownies

We’re almost to the end of the 7 recipes in 7 days! If you’ve enjoyed these recipes, we’d love you to share them on social media and tag us at @fruitfuldayuae on Instagram and @fruitfulday on Facebook.

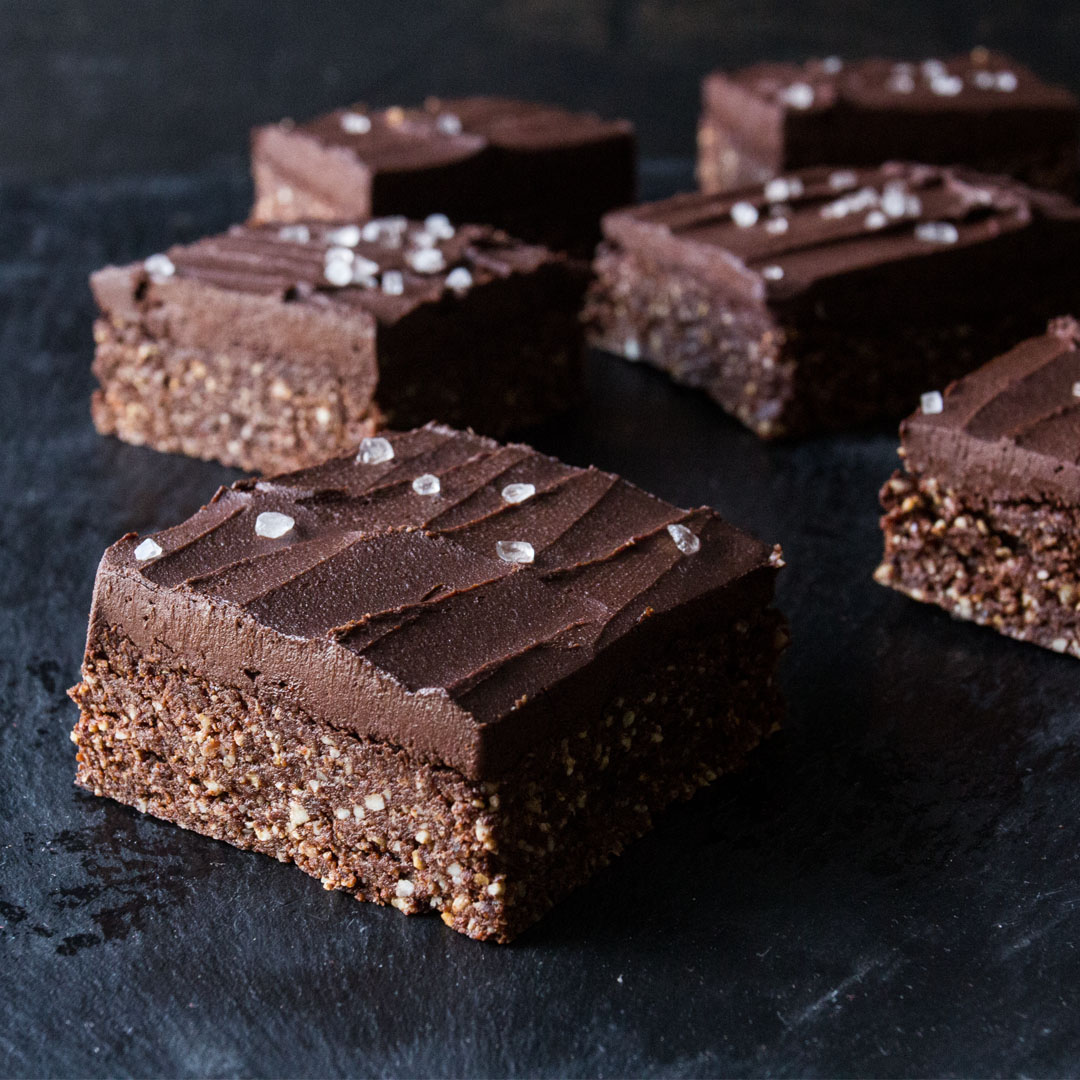
Our second to last recipe is for raw brownies, which essentially means they don’t need to be baked and thus are very quick and easy to make!

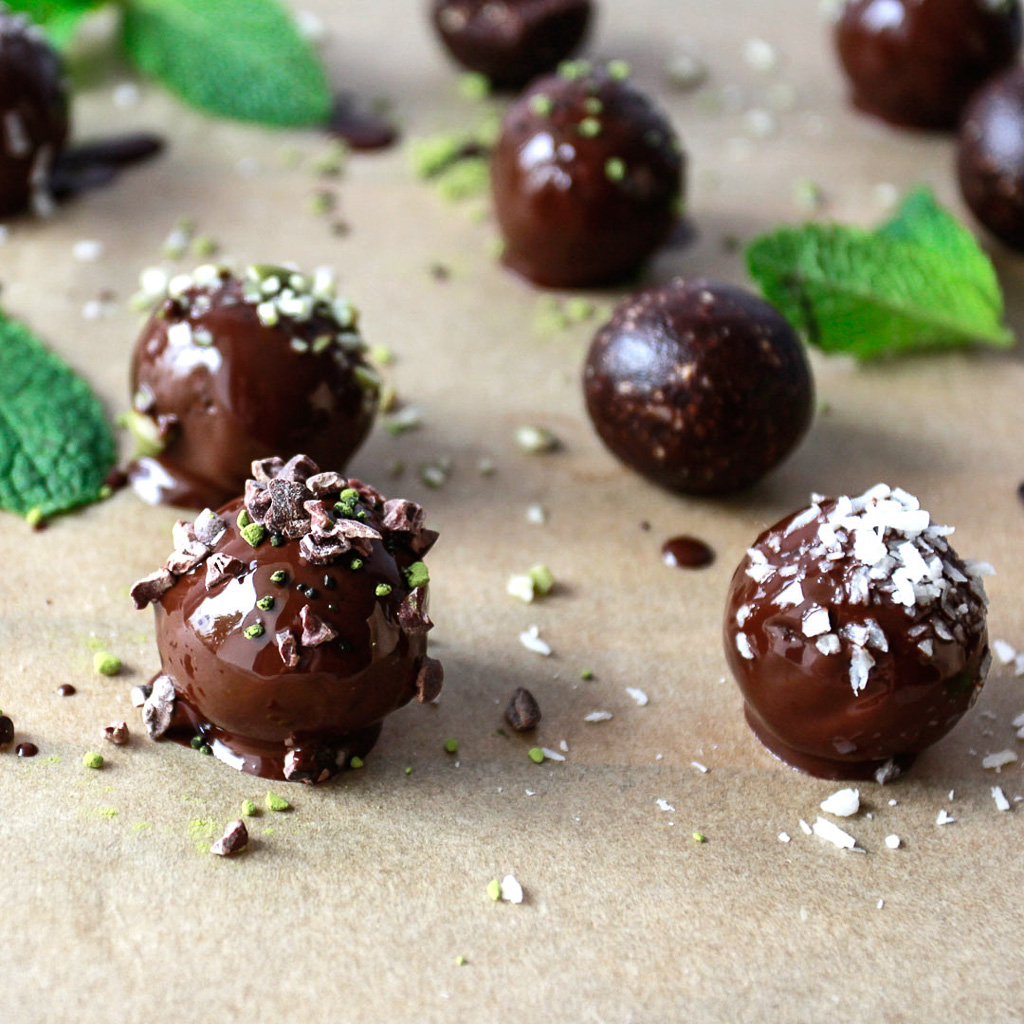
In an earlier blog post, we discussed the difference between cacao and cocoa. In case you missed it, check it out here in our mint cacao bliss balls recipe.  In short, if you can, choose cacao over cocoa because it is made by cold-pressing un-roasted beans meaning all the enzymes are left tact and we can enjoy all the health benefits.

Raw Brownies (makes one 20cm x 14cm brownie sheet – can be cut into any size) 

Raw Brownies

30 minutes

INGREDIENTS for the brownie

  • 1 ½ cups mixed nuts and seeds from the Fruitful Day box: sunflower seeds, cashews, pecans, pumpkin seeds
  • ¾ cup fresh grated coconut (or substitute for dry desiccated coconut)
  • ¾ cup cacao powder
  • 1 ½ cups dates from the Fruitful Day box
  • 1 tbsp peanut butter
  • 1 tbsp coconut butter
  • 1 tbsp coconut oil
  • ¼ tsp salt

INGREDIENTS for the ganache 

  • 200g dark chocolate
  • 200g coconut cream

Raw Brownies

METHOD for the brownie

  1. Add all dry ingredients to a food processor; nuts, seeds, cacao powder and salt and pulse until broken down into small pieces.
  2. Add wet ingredients; dates, grated coconut, peanut butter, coconut butter and coconut oil. Process until the ingredients come together as a dough.
  3. Line a rectangular baking tray with cling film.
  4. Press the brownie dough into the tray and flatten until it’s a brownie sheet about 2cm thick.

* Note – if you substitute fresh grated coconut with desiccated coconut, the dough may be quite dry. If this is the case, add more peanut butter, coconut butter or coconut oil. The dryness of both the coconut and the dates will determine whether to add more wet ingredients. The dough should come together and hold together easily.

METHOD for the ganache 

  1. Cut chocolate up into little pieces and place in a large bowl.
  2. Place coconut cream in a saucepan on medium heat and allow to reach a gentle simmer – do not boil.
  3. Pour coconut cream over the chocolate and let it sit for 5 minutes until all the chocolate is melted.
  4. With a whisk, stir the mixture until the chocolate and cream are combined. Allow to set in the fridge for 10 – 15 minutes or until it’s of a spreadable consistency.
  5. With a spatula, spread the ganache over the chocolate brownie and garnish with some sea salt or cacao nibs.

Nut Butter Cups

It’s the weekend so little indulgences are definitely allowed.  Afterall, life is about balance.

Today’s recipe is for homemade nut butter cups. Step aside Reese’s peanut butter cups, we have a healthier version for you! By making it yourself, it will leave you more satiated as you can add in healthy fats such as coconut oil and peanut butter.  Instead of 5 nut butter cups, you’ll only feel the need to grab 1 of these babies!

This recipe is quite easy to make and if you’e short on time you can even buy pre-bought nut butter to cut the time down to 15-20 minutes.

If you want to make it vegan, simple replace the honey with maple syrup.

We hope you’re enjoying our week of recipes. As always, we’re here to make a healthy lifestyle easier and more accessible to all.

Nut Butter Cups (makes 12 nut butter cups) 

Nut Butter Cups

1 hour (including setting time)  

INGREDIENTS for the nut butter 

  • 1 cup mixed nuts from the Fruitful Day Box.
  • ¼ tsp salt
  • 1 tbsp coconut oil

INGREDIENTS for the chocolate 

  • ½ cup coconut oil
  • 3 tbsp cacao butter
  • ¾ cup raw cacao powder
  • ¼ cup honey / maple syrup (or less if you prefer it to be less sweet)
  • ¼ tsp salt

Nut Butter Cups

METHOD for the nut butter

  1. Preheat oven to 160 degrees C.
  2. Place nuts on a baking tray and roast for 6 – 8 minutes or until browned.
  3. While still hot, place nuts in a high speed blender with the coconut oil and salt. Depending on how powerful your blender is, you may need to add coconut oil to help the blades spin.
  4. Place in the fridge to harden while you make the chocolate.

METHOD for the chocolate

  1. Place the coconut oil and cacao butter in a bain-maire (a glass bowl over a pot of simmering water) and stir until melted.
  2. Add honey/maple syrup and stir.
  3. Remove from the heat and add cacao powder and salt. Stir until combined.
  4. Line a cupcake or muffin tray with paper baking cups.
  5. Pour approximately 2 tbsp of chocolate mixture into the base of the paper baking cup and place in the fridge to set. This should take 10 – 15 minutes.
  6. Once set, spoon 1 – 2 tsp nut butter on the set chocolate base. If the nut butter is too runny it will run to the edges rather than sitting in the centre.
  7. Pour the melted chocolate mixture over the peanut butter until it’s totally covered.
  8. Return to the fridge to set. This should take 15 – 20 minutes. Once set, the paper should peel off very easily.

Raw Vegan Lime & Cherry Tart

We promised you 7 recipes in 7 days and we think you’ll love this 2nd one!  Desserts are a weak spot for many of us, but they don’t have to be a guilty indulgence. If you plan ahead, you can actually fill your desserts with whole foods that will enrich you in some way.

Our Raw Vegan Lime & Cherry Tart is inspired by LA’s well-known vegan Cafe Gratitude.  What makes it different than a typical vegan cheesecake is that the crust is made primarly with fresh grated coconut rather than nuts.  There are also NO filler ingredients like potato starch, thickeners like guar gum or alcohol sweeteners that are hard on your stomach.

In case you missed our first recipe in the series, click here to learn how to make apricot and orange granola bars.

Raw Vegan Lime & Cherry Tart (makes one small 12cm tart – you can double the recipe to make a large tart) 

30 minutes (not including chilling time)

Raw Vegan Lime & Cherry Tart

INGREDIENTS for the crust 

  • 3/4 cups of soaked cashews (soaked overnight or for at least 4 hours) from the Fruitful Day Box
  • ½ cup desiccated coconut
  • ¼ cup macadamia nuts
  • 28g dates from the Fruitful Day Box
  • ½ tsp vanilla extract
  • Pinch of salt

INGREDIENTS for the filling 

  • 3/4 cups of soaked cashews (soaked overnight or for at least 4 hours) from the Fruitful Day
  • ¼ cup fresh shredded coconut
  • Juice of 3 limes from the Fruitful Day Box
  • ¼ cup of maple syrup
  • 1/8 tsp turmeric
  • 1/8 cup coconut milk
  • 1 ½ tsp vanilla extract
  • 1/8 tsp salt
  • 7 tbsp melted coconut oil
  • 1 tbsp melted cacao butter
  • Two handfuls of cherries from the Fruitful Day Box

Raw Vegan Lime & Cherry Tart

METHOD for the crust 

  1. Process all ingredients except the dates in a food processor.
  2. Add dates and process until the mixture comes together to form a dough.
  3. Line your tart dish with cling film or grease with coconut oil.
  4. Press crust into the base of the dish until it forms an even curst that rises up the edges by about 2cm.
  5. Leave to set in the fridge.

Method for the filling

  1. Blend all ingredients in a high speed blender until they are smooth. You may need to add more coconut oil or cacao butter depending on how strong your blender is.
  2. Pour the filling into the pie crust.
  3. Remove stems from cherries, slice in half and pit.
  4. Use these cherries as a garnish on top of the tart.
  5. Set in the freezer for – 2 hours.

Apricot & Orange Granola Bar

7 days, 7 recipes!

It’s the middle of the summer and we totally get how difficult it is to be stuck inside for most if not ALL of the day. However, it’s the perfect time of year to practice your cooking skills so for the next 7 days we’re going to share a recipe every day with you that is both HEALTHY and DELICIOUS.

First up is a homemade granola bar!  Most supermarket granola bars contain sugar, corn syrup, wheat or canola oil and by making it yourself you know exactly what is going inside. These apricot and orange granola bars are perfect to take to work or if your kids don’t have nut allergies, they can be a great afternoon snack before anyone gets hangry.

As an aside, we have just discovered the most delicious apricots from Uzbekistan. You have to try them out! Available in our discovery box here.

Happy snacking.

Apricot & Orange Granola Bar 

(makes one square tray of 20cm x 20cm)  

Healthy Granola Bars: Apricot & Orange

45 minutes

INGREDIENTS for the crust 

  • 100g walnuts from the Fruitful Day Box
  • 120g gluten free oats
  • 100g apricots from the Fruitful Day Box
  • 50g pumpkin/sunflower seeds from the Fruitful Day Box
  • ¼ tsp salt
  • 1 tsp cinnamon
  • ¼ tsp nutmeg
  • Zest of one orange from the Fruitful Day Box
  • 90g peanut butter
  • 50g honey
  • 30g cacao butter/coconut oil/grass fed butter

METHOD 

Healthy Granola Bars: Apricot & Orange

  1. Preheat oven to 160°C
  2. Roughly chop walnuts
  3. Finely chop apricots
  4. Add all dry ingredients to a bowl; walnuts, oats, apricots, seeds, spices and salt.
  5. Add wet ingredients; orange zest, peanut butter, honey and oil.
  6. Combine until this mixture forms a dough.
  7. Press mixture down into a lined baking tray and bake at 160°C for 20 – 30 minutes or until browned.
  8. Remove from oven and allow to cool.


Smoothie Bowl

In Ramadan, we always try to do something special with our discovery boxes to celebrate the Holy Month. For those of you who are customers, we hope that you have been enjoying the extra nuts, seeds, and dried fruits! If you haven’t tried our discovery box yet, this is one of our favorite time of the year not only because of the extras, but also because stone fruit season has just started and that means lots of yummy fruits like cherries, plums, nectarines, and apricots.

Today’s smoothie bowl recipe is perfect for Suhoor or even if you’re not fasting something to keep you going for a little longer.  In particular, coconut and cashews are both packed with healthy fats that help you feel satiated for longer. From your Fruitful Day box you can use your cherries, bananas, and pretty much any nuts and seeds in the box to craft these beautiful bowls of goodness.


Until next time and Ramadan Kareem!

Smoothie Bowl

(makes 2 large smoothie bowls)

5 – 10 minutes                                                         

INGREDIENTS

  • 2 frozen bananas from the Fruitful Day Box (this requires you to peel, chop and freeze the bananas the night before)
  • 1 cup frozen sour cherries
  • ¼ cup fresh coconut
  • 2 tbsp cacao powder
  • 2 tbsp cashews
  • ¾ cup coconut milk  

* optional toppings of cacao nibs, granola, berries, bee pollen, edible flowers, coconut chips

From the Fruitful Day Box: dried banana chips, nuts, seeds and dried fruit.

METHOD

  1. Blend all ingredients and pour into a bowl.
  2. Add toppings

* To get the colour variant you see in the photo:

  1. Omit the cacao powder and blend. Pour a little out and set aside.
  2. Add the cacao powder and blend again.
  3. Pour dark smoothie mixture into a bowl and then use the pink smoothie mixture to create patterns on top.


Immunity March: Gooseberry & Mango Crumble

We hope everyone is having a good week. It’s been hectic on our side as we have something special to announce this Thursday that we’ve been working hard on! When you’re busy running around, it’s often easy to forget to take care of yourself, but it’s so important to make sure you don’t get run down and sick. Eating the right foods can help you build up your IMMUNITY, which is our focus for the month of March.

Today’s recipe is a gooseberry and mango crumble, which we have selected this month because of the immunity boosting qualities of gooseberries. Gooseberries actually have more Vitamin C than lemons, which helps to boost your immunity and clear your skin. In addition, they are full of Vitamin A, which is known to improve eyesight and of course immunity too. They are also known for their anti-oxidant qualities, which are unique compared to other berries because of their yellow-orange color.

If you’ve never had a gooseberry and wondering what to expect, think about Sour Patch Kids, but the healthy version of course! We’re so excited about this recipe, we may bake one on Thursday to celebrate our announcement!

Gooseberry & Mango Crumble (makes one 25cm shallow crumble)  

30 – 40 minutes

INGREDIENTS

Immunity March: Gooseberry & Mango Crumble

 For the fruit mixture

  • 1 mango (approx. 560g) from the Fruitful Day Box
  • 100g gooseberries from the Fruitful Day Box
  • 20g coconut sugar
  • Juice 1 lime
  • 1 tsp cinnamon

 For the crumble  

  •  50g gluten free flour
  • 100g almond flour
  • 40g coconut flour
  • 80g roughly chopped almonds
  • 30g coconut sugar
  • 125g grass fed butter
  • 2 tsp cinnamon
  • 2tsp ginger powder
  • Pinch of salt

METHOD

Immunity March: Gooseberry & Mango Crumble

  1. Preheat oven to 160 degrees C.
  2. Cube the mango, cut the tops off the gooseberries and cut them in half.
  3. Place fruits in a bowl along with the coconut sugar, lime, salt and cinnamon. Mix well and then scoop into the baking dish.
  4. Bake the fruit mixture on it’s own for 10 minutes. This ensures a very caramelised flavour.
  5. While the fruit is baking, mix all flours together in a bowl along with the chopped almonds, coconut sugar, cinnamon, ginger and salt.
  6. Cube the butter and then rub it into the flour and spice mixture. The mixture should begin to be crumbly, however, you don’t want the crumbs to be too small as they will burn in the oven.
  7. Remove the fruit mixture from the oven and sprinkle the crumble mixture over it evenly.
  8. Return to the oven and bake for 10 – 12 minutes or until browned on top.
  9. Serve with yoghurt or cream.

Immunity March: Mint Cacao Bliss Balls

March is here and people are getting colds left, right, and center! For the body’s natural defenses to work smoothly and make sure you’re not next to get sick, your immune system has to be working properly. Choosing foods rich in the right vitamins and nutrients will help keep your immune system strong and you healthy!

Throughout the month of March we will feature easy to make recipes, which are aimed at boosting your IMMUNITY. As always, we’d love to hear from you about what types of recipes you’d like to see next!

Our first recipe of the month are mint cacao bliss balls! To understand why we would select a chocolate recipe as our first recipe, it is important to first understand the difference between cacao and cocoa. Although both start from the same place (the beans from the cacao tree’s seed pods), the process they undergo means they have very different benefits to offer. Cacao, which is very minimally processed at low temperatures, is full of nutrients like magnesium, iron, potassium, calcium, zinc, copper, and manganese. Some of the known health benefits are protecting your heart, lowering your insulin, as well as other antioxidant effects, which protect your cells from damage. Cocoa, on the other hand, is heated to much higher temperatures where sugars and other sweeteners are usually added. The heating process means that some of the more powerful antioxidant effects and health benefits are lost as compared to cacao*.

When you make your food from scratch, you can decide what ingredients you’re feeding your body! So while these mint cacao bliss balls might look like naughty treats, the ingredients have been very carefully selected to boost your immunity and fill you up with the good stuff. Wishing you all a very healthy, happy March!

Mint Cacao Bliss Balls (makes approx. 30 balls)
Immunity March: Mint Cacao Bliss Balls

30 – 45 minutes (including time to roll the balls)  

INGREDIENTS

  • 1 cup cashews from the Fruitful Day Box
  • ½ cup desiccated coconut
  • ½ cup cacao powder
  • pinch salt
  • drop of mint extract
  • 1 cup dates
  • 2 tbsp coconut oil
  • 2 tbsp peanut butter

METHOD

Immunity March: Mint Cacao Bliss Balls

  1. Roast cashews for 10 minutes on a baking tray at 180 degrees C for 10 minutes or until browned. (This step isn’t necessary, however, roasting the nuts does improve the flavour).
  2. Combine all dry ingredients; cashews, coconut, cacao powder and salt in a food processor and pulse until evenly chopped.
  3. Add wet ingredients; dates, coconut oil, peanut butter and mint extract and process until a dough forms.
  4. Remove from the food processor and roll into balls. Store in the fridge.


*Source: https://blog.paleohacks.com/cacao-vs-cocoa/