Avocado Chocolate Mousse

Last week we introduced you to the newest addition of the Fruitful Day family, a fruit bouquet! It’s made with strawberries, raspberries, blackberries, physalis, and a touch of mint.

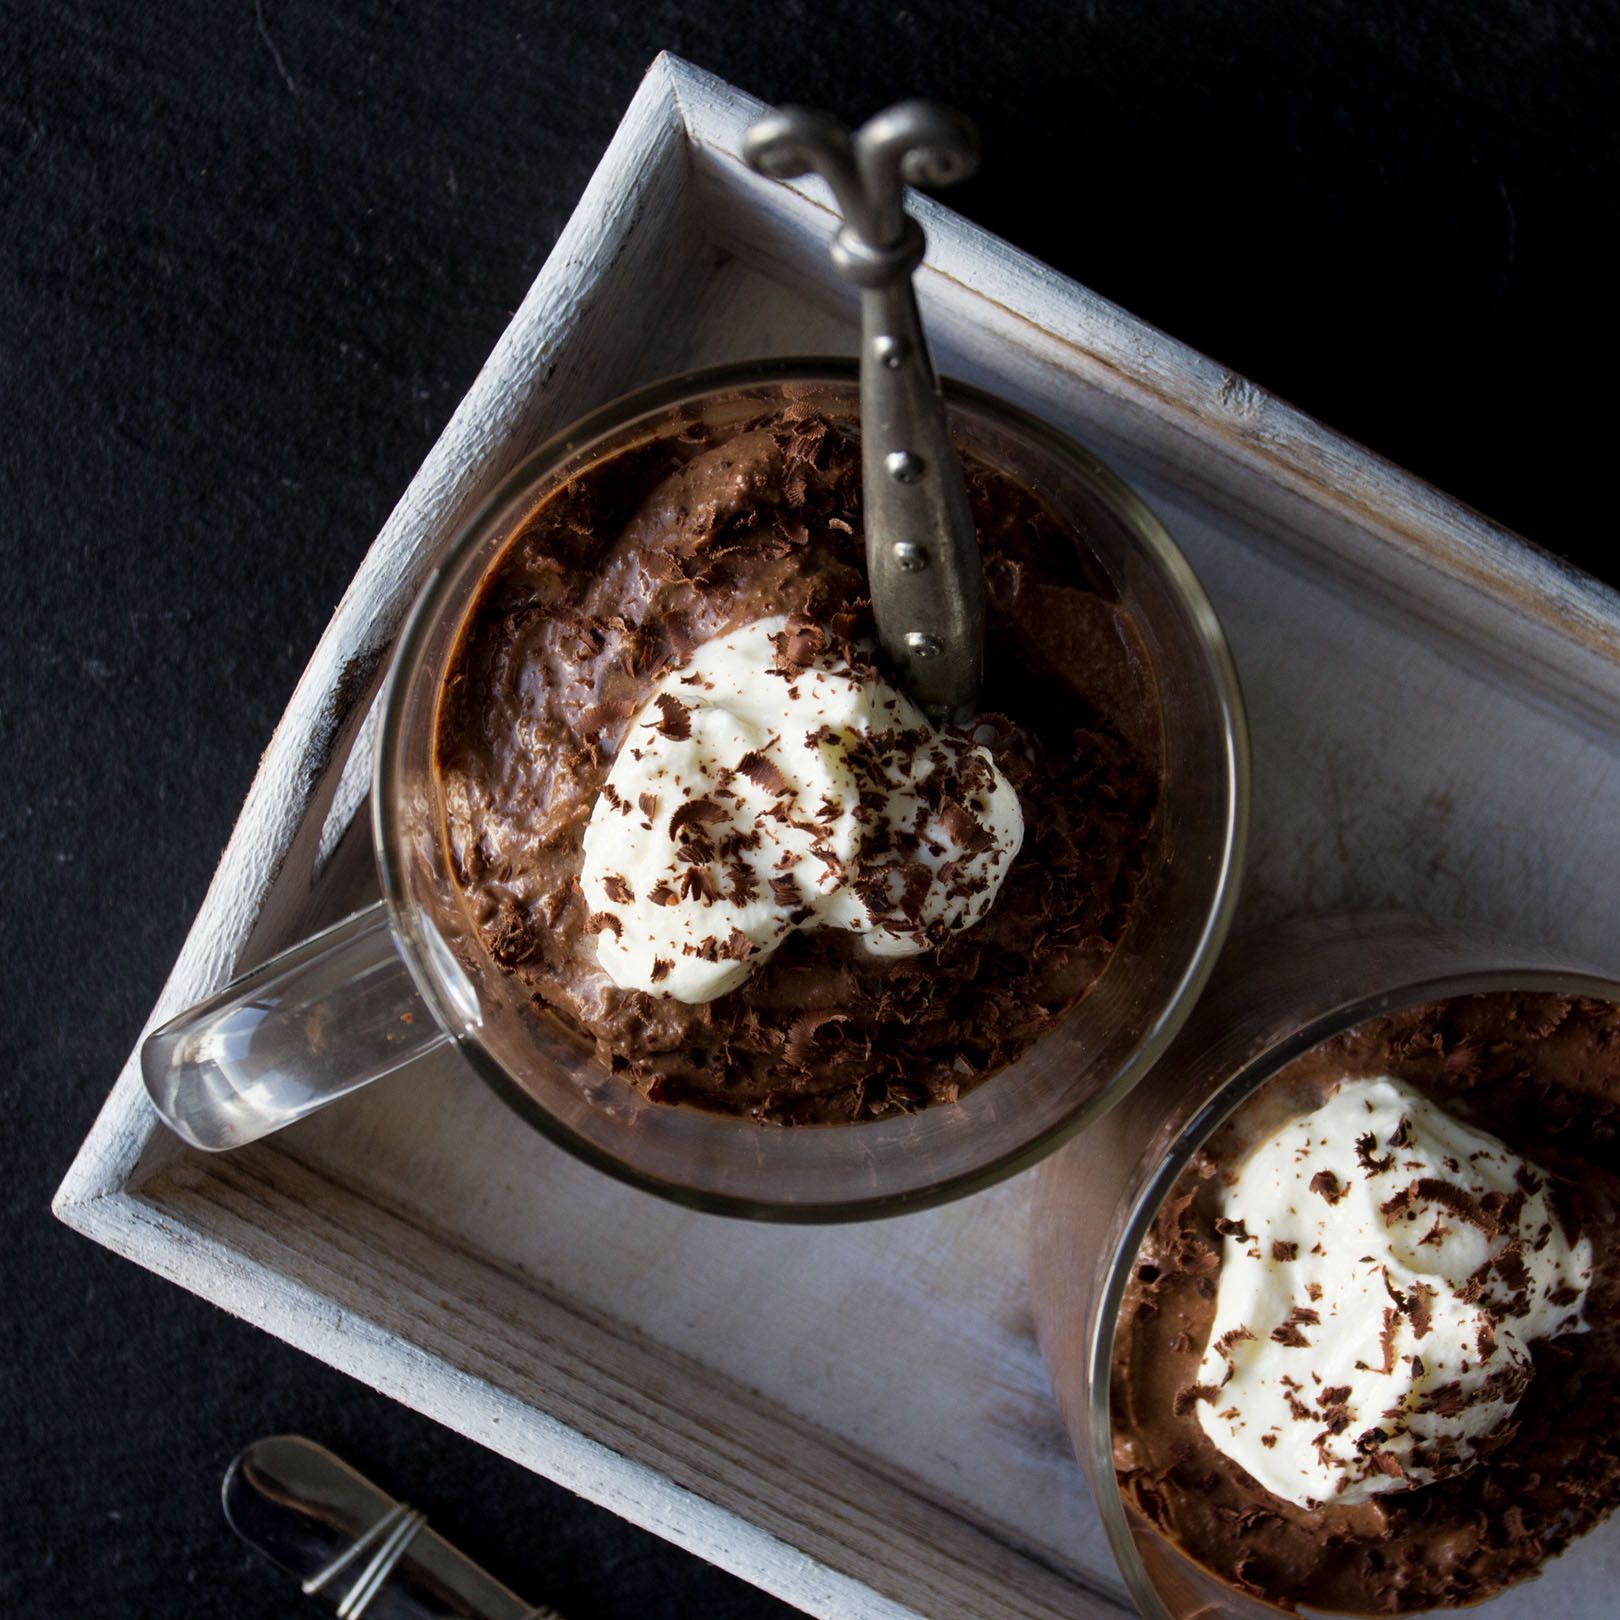
We wouldn’t want you to go without a new recipe for your Valentine too though!  This week we are sharing a recipe for an avocado chocolate mousse, which is a little different than your typical mousse as it uses melted chocolate achieving an extra creamy texture.

Whether you’re single, taken, or just plain hungry, we’re sure you’re going to love this dessert!  Wishing you a happy, healthy Valentines Day from the whole Fruitful Day family. 

Avocado Chocolate Mousse (serves 2/3 for dessert)  

30 minutes

Ingredients

  • 100g dark chocolate (you can use 70% cacao)
  • 1 tsp vanilla essence
  • 100g coconut cream (to make this – put the tin of coconut cream in the fridge overnight. In the morning, scoop only the cream off the top leaving the water behind. Set aside).
  • 1 avocado from the Fruitful Day Box
  • ½ tbsp honey (optional)
  • 50g full fat yoghurt or coconut yoghurt

METHOD

1. Place a glass bowl over a saucepan of simmering water. Chop the chocolate into small pieces and place into the bowl to melt.

2.  In a separate bowl, smash the avocado with a fork.

3. Place the coconut cream in a bowl and beat with a hand beater until it forms soft peaks.

4. Add the chocolate, vanilla, yoghurt, honey to the avocado and blend with a hand blender.

5. Add the whipped coconut cream and blend (leave a few tablespoons aside for garnish)

6. Garnish with coconut cream and grated dark chocolate.
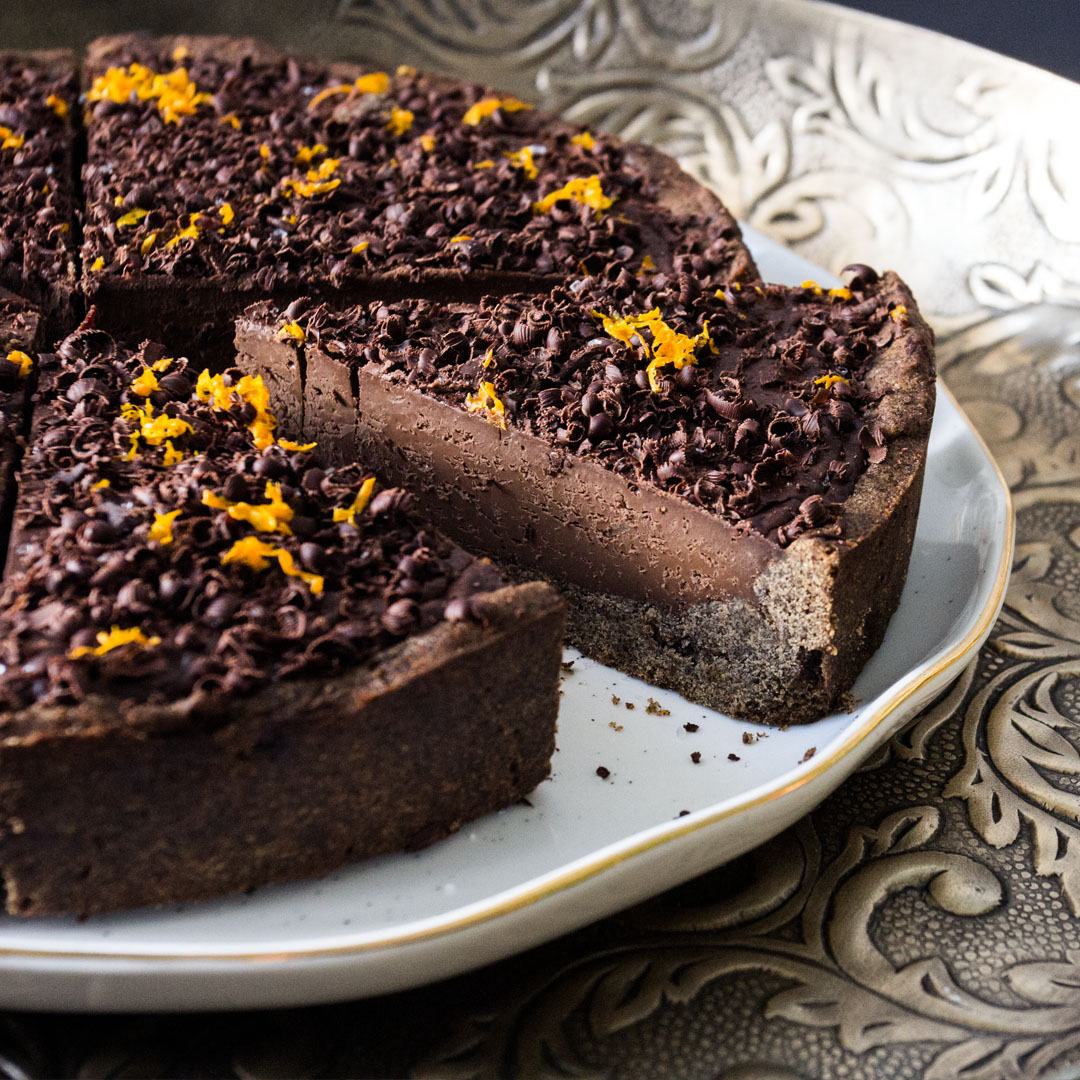
Chocolate Orange Tart

It’s Christmas Eve and what better way to celebrate than with a chocolate orange tart!  This tart is rich, creamy and indiscernibly healthy. How you wonder? If you use coconut cream and a refined sugar-free dark chocolate it is gluten, dairy and refined sugar free, which seems surprising for how decadent it is. Even if you use full cream and 85% Lindt chocolate, it’s still a gluten free dessert with minimal added sugar! 

This makes our Chocolate Orange Tart the perfect to please both the health conscious and the more indulgent festive eaters. With that, we wish those celebrating a Merry Christmas and a Happy New Year!  

We are so grateful for your loyal support through out 2018. We wouldn’t have been able to make it this far with out our most important ingredient – you our customer. Your continued support has allowed us to grow the team and get more creative in the process. We hope to continue to deliver the freshest, tastiest hand picked fruits to you and to continue to brighten up your days.

Chocolate Orange Tart (makes one 21cm tart)  

1 hour 15 mins

Ingredients for the crust

  • 120g gluten free flour
  • 120g buckwheat flour
  • 2 free range eggs
  • 100g butter
  • 100g coconut sugar
  • Zest of one orange from the Fruitful Day Box
  • 1 tea spoon cinnamon
  • ¼ tsp salt

Ingredients for the filling

  • 1 ¼ cups full cream or coconut cream
  • 2 tea spoon orange zest from the Fruitful Day Oranges
  • 300g dark chocolate (I used 85%)
  • 2 eggs
  • Pinch of salt

METHOD for the crust

  1. Remove butter from the fridge to soften and preheat the oven to 180 degrees C.
  2. Add all dry crust ingredients to a mixing bowl; gluten free flour, buckwheat flour, coconut sugar, zest, cinnamon & salt and sift together.
  3. Chop butter into cubes and whisk eggs in a separate bowl.
  4. Put cubed butter and eggs into the bowl with the dry ingredients and bring together as a dough in your hands.
  5. Wrap dough in the cling film and allow to harden in the fridge for one hour.
  6. Grease a 21cm tart tin or silicon mould with ghee or coconut oil.
  7. Once the dough is set, remove from the fridge and place onto a clean, dry floured surface.
  8. With a rolling pin, roll the dough into a flat circular shape. You may not be able to roll it very thinly as gluten-free crusts are much harder to work with.
  9. Once in the mould, you can press with your fingers to even it out across the bottom and up the sides. Then prick the crust with a fork all over.
  10. Cut out a circle of baking paper approximately 30 cm in diameter.
  11. Place this over your pie crust and pour some rice or beans into the centre to hold the paper down – this is called ‘blind baking’ – it allows the crust to bake evenly on it’s own before putting the filling in. The beans or rice act as weights to hold the baking paper down.
  12. Blind bake for 15 minutes and then set aside while making the filling


METHOD for the filling

  1. Put cream in a heavy bottom saucepan on medium heat and add the zest and salt. Bring to a simmer and stir.
  2. While cream is heating, finely chop 230g chocolate and place in a wide bottomed bowl.
  3. Pour 90% of the cream onto the chocolate and let it sit for 3 – 5 minutes. This allows the cream to melt the chocolate.
  4. Pour the remaining cream into a bowl with the eggs and whisk quickly. This tempers the egg mixture so the eggs don’t curdle when they come in contact with the hot cream.
  5. Next, add the egg and cream mixture to the chocolate and cream mixture. Stir with a whisk from the centre outwards until everything in incorporated evenly.
  6. Pour this mixture into the crust and bake for 18 minutes or until the chocolate is set in the centre.
  7. Remove from oven and cool on a rack.
  8. Remove from tart tin and garnish with remaining chocolate and orange zest.


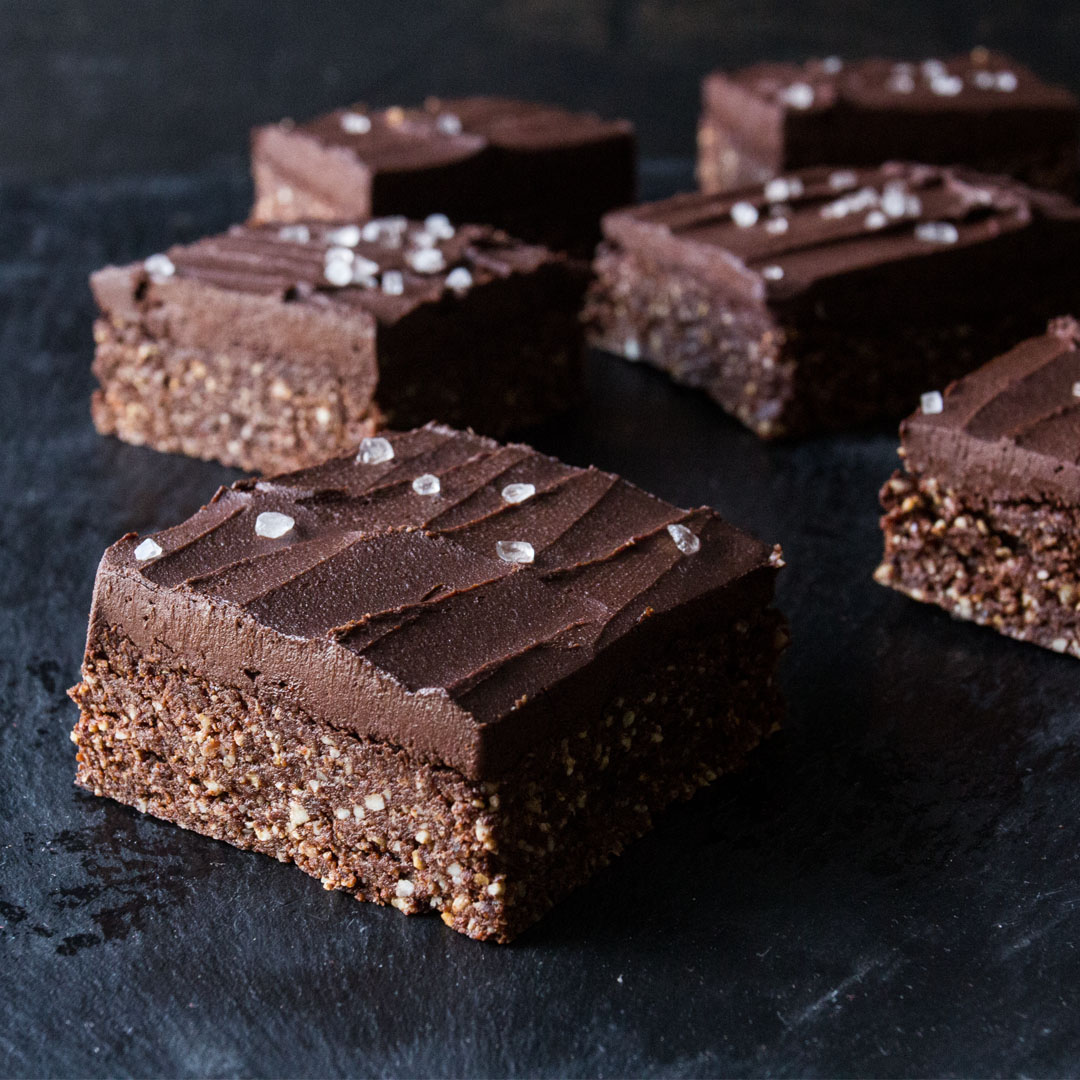
Raw Brownies

We’re almost to the end of the 7 recipes in 7 days! If you’ve enjoyed these recipes, we’d love you to share them on social media and tag us at @fruitfuldayuae on Instagram and @fruitfulday on Facebook.

Our second to last recipe is for raw brownies, which essentially means they don’t need to be baked and thus are very quick and easy to make!

In an earlier blog post, we discussed the difference between cacao and cocoa. In case you missed it, check it out here in our mint cacao bliss balls recipe.  In short, if you can, choose cacao over cocoa because it is made by cold-pressing un-roasted beans meaning all the enzymes are left tact and we can enjoy all the health benefits.

Raw Brownies (makes one 20cm x 14cm brownie sheet – can be cut into any size) 

Raw Brownies

30 minutes

INGREDIENTS for the brownie

  • 1 ½ cups mixed nuts and seeds from the Fruitful Day box: sunflower seeds, cashews, pecans, pumpkin seeds
  • ¾ cup fresh grated coconut (or substitute for dry desiccated coconut)
  • ¾ cup cacao powder
  • 1 ½ cups dates from the Fruitful Day box
  • 1 tbsp peanut butter
  • 1 tbsp coconut butter
  • 1 tbsp coconut oil
  • ¼ tsp salt

INGREDIENTS for the ganache 

  • 200g dark chocolate
  • 200g coconut cream

Raw Brownies

METHOD for the brownie

  1. Add all dry ingredients to a food processor; nuts, seeds, cacao powder and salt and pulse until broken down into small pieces.
  2. Add wet ingredients; dates, grated coconut, peanut butter, coconut butter and coconut oil. Process until the ingredients come together as a dough.
  3. Line a rectangular baking tray with cling film.
  4. Press the brownie dough into the tray and flatten until it’s a brownie sheet about 2cm thick.

* Note – if you substitute fresh grated coconut with desiccated coconut, the dough may be quite dry. If this is the case, add more peanut butter, coconut butter or coconut oil. The dryness of both the coconut and the dates will determine whether to add more wet ingredients. The dough should come together and hold together easily.

METHOD for the ganache 

  1. Cut chocolate up into little pieces and place in a large bowl.
  2. Place coconut cream in a saucepan on medium heat and allow to reach a gentle simmer – do not boil.
  3. Pour coconut cream over the chocolate and let it sit for 5 minutes until all the chocolate is melted.
  4. With a whisk, stir the mixture until the chocolate and cream are combined. Allow to set in the fridge for 10 – 15 minutes or until it’s of a spreadable consistency.
  5. With a spatula, spread the ganache over the chocolate brownie and garnish with some sea salt or cacao nibs.

Nut Butter Cups

It’s the weekend so little indulgences are definitely allowed.  Afterall, life is about balance.

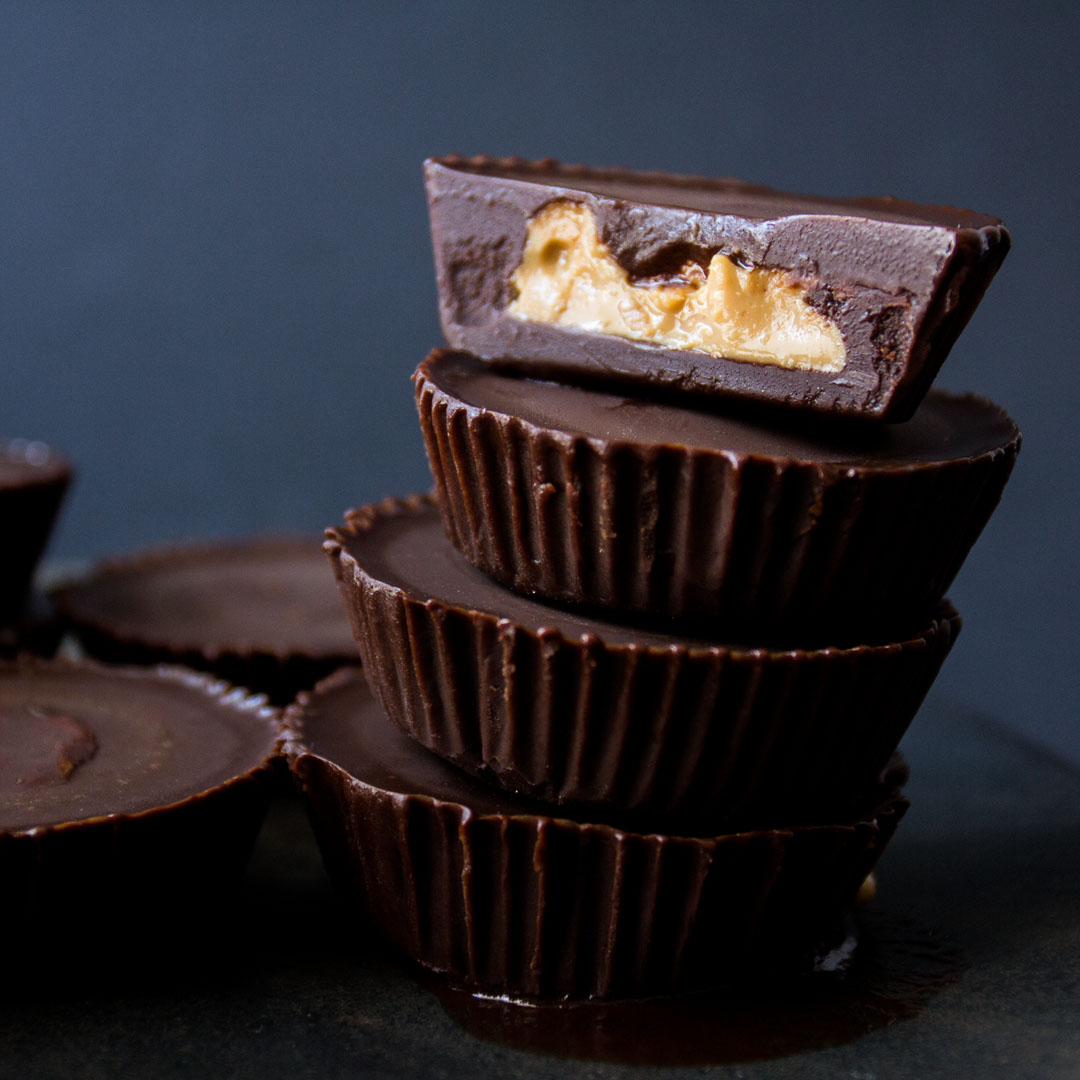
Today’s recipe is for homemade nut butter cups. Step aside Reese’s peanut butter cups, we have a healthier version for you! By making it yourself, it will leave you more satiated as you can add in healthy fats such as coconut oil and peanut butter.  Instead of 5 nut butter cups, you’ll only feel the need to grab 1 of these babies!

This recipe is quite easy to make and if you’e short on time you can even buy pre-bought nut butter to cut the time down to 15-20 minutes.

If you want to make it vegan, simple replace the honey with maple syrup.

We hope you’re enjoying our week of recipes. As always, we’re here to make a healthy lifestyle easier and more accessible to all.

Nut Butter Cups (makes 12 nut butter cups) 

Nut Butter Cups

1 hour (including setting time)  

INGREDIENTS for the nut butter 

  • 1 cup mixed nuts from the Fruitful Day Box.
  • ¼ tsp salt
  • 1 tbsp coconut oil

INGREDIENTS for the chocolate 

  • ½ cup coconut oil
  • 3 tbsp cacao butter
  • ¾ cup raw cacao powder
  • ¼ cup honey / maple syrup (or less if you prefer it to be less sweet)
  • ¼ tsp salt

Nut Butter Cups

METHOD for the nut butter

  1. Preheat oven to 160 degrees C.
  2. Place nuts on a baking tray and roast for 6 – 8 minutes or until browned.
  3. While still hot, place nuts in a high speed blender with the coconut oil and salt. Depending on how powerful your blender is, you may need to add coconut oil to help the blades spin.
  4. Place in the fridge to harden while you make the chocolate.

METHOD for the chocolate

  1. Place the coconut oil and cacao butter in a bain-maire (a glass bowl over a pot of simmering water) and stir until melted.
  2. Add honey/maple syrup and stir.
  3. Remove from the heat and add cacao powder and salt. Stir until combined.
  4. Line a cupcake or muffin tray with paper baking cups.
  5. Pour approximately 2 tbsp of chocolate mixture into the base of the paper baking cup and place in the fridge to set. This should take 10 – 15 minutes.
  6. Once set, spoon 1 – 2 tsp nut butter on the set chocolate base. If the nut butter is too runny it will run to the edges rather than sitting in the centre.
  7. Pour the melted chocolate mixture over the peanut butter until it’s totally covered.
  8. Return to the fridge to set. This should take 15 – 20 minutes. Once set, the paper should peel off very easily.