5 Facts About Celery Juice Every Health Fanatic Needs To Know

Fact or Fiction? Debunking the latest health phenomenon that is celery juice.
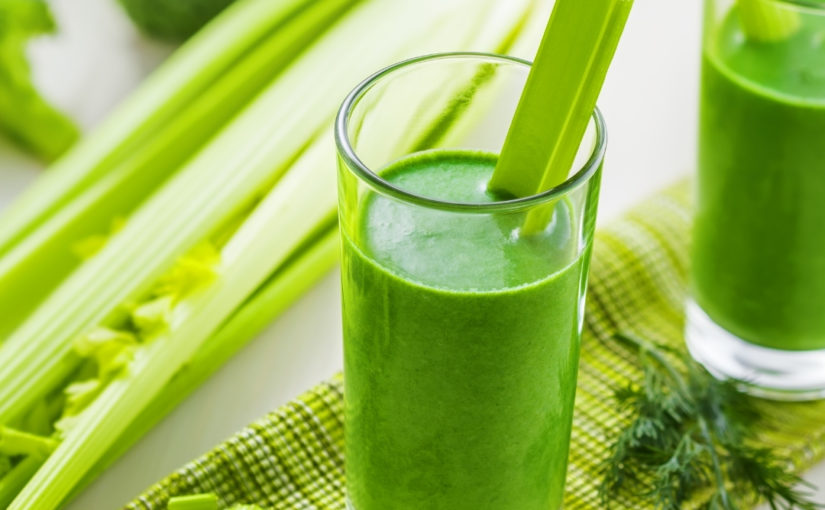
Celery juice is just the latest buzzword to hit the health and fitness landscape. With little interest being shown previous to 2019, it has fast become the next instagramable health fad.

Perhaps you’ve seen it scrolling through Instagram (with over 100,00 results when searched) or being recommended by any number of celebrities from Gwyneth Paltrow to Jennifer Aniston. This bright green and leafy tasting drink is being downed by the glassful with it being hailed as a miracle cure for many ailments from acne to inflammation and psoriasis. As with any new wellness trend on the market, it’s always important to do some research before you jump on the bandwagon. So before you buy a juicer here are some myths and facts behind celery juice.

It is worth noting that Mr Williams is not a licenced nutritionist nor a medical doctor. 

In order to reap the full rewards, celery should be juiced, pulp removed and drunk by itself. A full 16 ounces are drunk on an empty stomach first thing in the morning at least 30 minutes before breakfast. The supposed benefits include helping improve digestion, autoimmune disorders, psoriasis, acne, chronic fatigue syndrome, acid reflux, the shingles virus, strep bacteria and weight loss.

Much of the evidence supporting these claims are anecdotal stories passed through Instagram stories or blogs. 
As mentioned by Michele Berman (M.D) a Pediatrician writing for HealthyButSmart.com, there are only a handful of articles in PubMed that specifically mention celery juice. None involve human subjects. With regards to celery itself, there are 1109 articles related to celery in the scientific literature, with only 14 clinical trials in comparison to 3000 publications related to carrots, including over 90 clinical trials (at the time of the article being released)

Can celery juice help with digestion and bloating?


While celery in itself is a good source of potassium, vitamin K, and flavonoids (compounds that have powerful antioxidant and anti-inflammatory properties) these are often in minute quantities The vast majority of celery’s benefits are derived from its high percentage of water content (95%). While the micronutrients may be beneficial, for example, one stalk provides about 15% of our daily vitamin K, improved digestion or decreased bloating is often the result of the high percentage of plain old water! It may be that the positive effects of celery juice are being mistakenly perceived as needing to drink a few extra glasses of water. Perhaps skip purchasing the pound of celery needed to make the juice and focus on making sure you are hydrated with a daily 4-6 cups of water

Does celery juice help with detoxing?

Let’s establish a firm basis before we dive into the claims of celery juice. While detoxing is still commonly perceived as a way to remove toxins or heavy metals, it is clear that this myth is quickly becoming unravelled.  Any detox that claims to cleanse the intestines and body of waste products for good health is fiction.

Much of the research highlighting detoxes as a fad stems from the fact that your body comes prepared to filter waste with its very own built-in detox machine: your liver. Indulging in a juice cleanse can be at best expensive and worst seriously harm the functioning of your kidneys and liver.  

Does celery juice help with our gut?

A key reason celery juice health benefits are heavily debated is that when celery is juiced, all the essential fibre that improves intestinal health is lost. Our gut microbiome is also an essential part of our well being and fibre is the primary fuel source for many of the microbes. Removing the fibre from the celery prevents your gut from receiving an additional boost.

Not to mention the fibre is well known for making you feel fuller for longer as it takes longer to break down. Drinking celery juice may eradicate these steps and lead to feelings of hunger or cravings.

Looking for tips on how to improve your digestion? Take a look at our previous blog post.

Does Celery juice help lower inflammation?

Celery contains specific flavonoids such as phytosterol that have been shown to help decrease inflammation. When the celery is juiced, the fibre is stripped and often the helpful flavonoids with it.

While celery itself helps with inflammation, there have been no studies to further positively promote that the juice does. If you have a craving for celery and looking to retain the most benefits perhaps munch on a few sticks as an alternative to the juice. Better yet, why not snack on a variety of fresh veg like carrot and cucumber with fresh hummus with the Fruitful Day’s Veg Delight Platter

While the evidence is lacking, it doesn’t mean you need to put a hold on all future celery juice drinking. If you love the taste and feel the benefits, then keep gulping it down. Just keep in mind that it is highly under-researched and may not be the miracle cure you were looking for. 

It is also helpful to remember if you do want to add juices to your diet, there are a few things you can do to make sure you consume juices in the healthiest way possible -just keep in mind with juice a little goes a long way! Introduce a variety of fruit and veg into your juice or smoothie to add additional micronutrients (take a look at our range here) or make up for the essential fibre loss that comes with juicing elsewhere in your diet by snacking on whole fruit and veg (take a look at one of our easy-to-go boxes).

A Helpful Guide to Self-Care September

Cancelling plans is okay. Staying home to cook is okay. Disappearing to get your life together for a bit is okay. It’s called self-care.

A light-hearted note to introduce Self-Care September.

Self-care is a term that pops up frequently on social media conjuring up thoughts of luxurious bubble baths and face masks but more importantly and perhaps not spoken about as often is it is a space for you to prioritise yourself and take some much-needed me-time to restore not only your physical but also your mental wellbeing in whatever shape that may be.

September brings with it a few changes with Autumn rolling in, the weather cooling and the new school year starting. It can be a great time to slow down and reflect before the hustle and bustle of the new season. 

As the Action for Happiness movement states“Self-care isn’t selfish; it’s essential.” In today’s world of bright screens, ever scrolling thumbs and constant hustling, we often place our needs on the back burner leading to feelings of anxiousness, exhaustion and being overwhelmed. By incorporating Self-care more regularly in our daily lives, we are helping ourselves to restore our mental and physical health. It’s essential, now more than ever on the heels of a pandemic, to be kind to yourself and make self-care a priority.

This month we encourage you to be a little kinder to yourself (as well as others). Not too sure where to start on your self-care journey? Not to worry, we’ve rounded up some easy tips for decreasing stress, encouraging happiness, and stepping up overall health.

  •  Get those Zzz’s in

An essential part of taking care of yourself is making sure you have the basic necessities met. One aspect we sometimes forget with our busy lives is sleep! If you think sleeping is for the dead, then this one is definitely for you.

To be a functioning human adult, doctors recommend adults to sleep between 7-9 hours a night (depending on age, sex and genes). Part of a good night’s sleep is a healthy nighttime routine, so try limiting the endless scrolling (we know it’s hard), pop your phone in another room, spray some lavender essential oils and get cosy for a night of deep sleep.

If 7-8 hours nightly is challenging, then indulge and sleep in a little on the weekend. Don’t worry, that 8:00 am workout class can wait (and don’t forget to be kind to yourself about it!)

  •  A little gratitude goes a long way 

Every cloud has a silver lining, and often our brains are trained to see the negative, which can overall leave us feeling a little more teary after a hard day. However, taking a few minutes out of your day to focus on five things you’re grateful for can help remove the emphasis on the negatives and help shed light on the positives, no matter how much the day may have sucked.

  •   Say no!

 You are not a perfect human being expected to be everywhere with everyone all the time. You can only do your best and still retain some semblance of sanity! So next time you agree to cook dinner for friends after a week of business lunches and to cater the school bake-off-, take a break. Say no and take a rain check. It’s okay, we promise you! You are more important than your to-do list, so prioritise your well-being as psychologist, Erica Wollerman states.

  • Create Family/Friend Time

Schedule some time to spend with the ones you love. Reconnecting over dinner or chatting over a cup of coffee with close friends can help us to ground ourselves and develop healthy stress coping mechanisms. Research has shown that spending time with family and friends can be linked with decreasing stress levels and may even increase your lifespan.

Easy is the name of the game on Fruitful Day. If you’re looking to ditch slaving over a 5-course meal for friends and family and looking for a cosy way to catch up try our grazing platter.


  • Get Active

An oldy but a goody. A 15-minute brisk walk in the park or a 45-minute cycle class-pick your poison. Either way, get moving and get those happy hormones flowing to give your mental health a quick glow-up. 

  •  Unplug

With our phones primed to keep us scrolling and our work lives at our fingertips, the lines between real life and work/social media can become blurred, keeping us “on-call” nearly 24/7.  An entire digital detox is not needed,(although, ditching the phone at home and heading out into nature can also be great) try setting a daily limit or switching your phone to Flight Mode on the weekends and evenings to feel more in touch with your near and dear as well as the wider world. Use the time to unwind and focus on some more of the self-care tips we are about to dive into.

  • Take 5 minutes out for yourself

It may not seem like a huge action, but taking 5-10 minutes out of your day to slow down can be extremely beneficial. It doesn’t necessarily mean laying down the yoga mat and meditating; it may just be grabbing a favourite book or even practising some breathing exercise for a few minutes. This can help us to slow down our ever racing minds and draw a bit of perspective.

  • Laughter is the Best Medicine

Whether you’re quietly giggling at a puppy on Facebook or chuckling at another Modern Family episode – laughter does you good!

A few LOLs here and there can help positively boost mood by stimulating the brain to release endorphins (our happy hormones), reinforce our immune systems, raise our pain tolerance, and strengthen relationships. So, pop on your favourite comedy or head out to the laughter factory to get your daily dose of laughter.

  • Feed your body well

 It would not be Fruitful if we didn’t add at least one fruit recommendation!

A simple and easy way to practice self-care is to add more fruits and veggies to your daily diet. Countless studies have shown the positive effects not only physically but mentally on loading up on nature’s candy! One research study has suggested that eating berries, for example, is a neat way to boost your brain health. And, as the age-old saying goes, an apple a day does, indeed keep the doctor away. As one study stated, prescribing an apple a day to adults aged 50 and over would help prevent or delay vascular deaths such as heart attacks.

It can be a little overwhelming with the wealth of evidence out there supporting all fruit and veg but, at Fruitful Day we aim to make Self-care this month as straightforward as possible with our Immunity Box, which contains everything you might need to help boost mental and physical well being.
Self-care is highly personalised, so incorporate all or only a few tips; the essential theme running throughout is to focus on you and your needs and be kind to yourself! And, if you feel like you didn’t get the fullest experience of Self-care this month, luckily Treat Yo Self Day is October 13. Perfect timing.

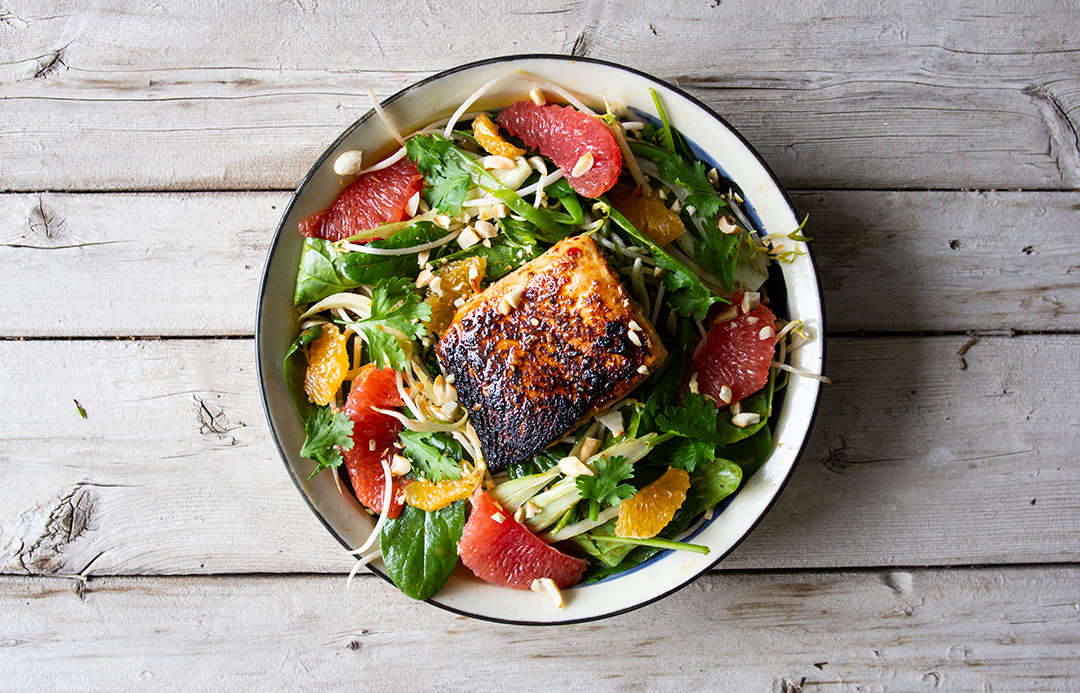
Spicy Citrus Salmon Salad

It’s been a while since we last posted on our blog, and what better way to get back into it, than with a salad that ends all salads!

If you’re a fan of spice and citrus, then you are going to love this recipe! With the citrus season coming to an end, we thought it was the perfect time to post this salad as it includes juicy grapefruit and delicious mandarin, and both add different flavours to this salad. The salmon, on the other hand, adds a wonderful taste, with its spicy marination. The combination of the citrus and spice will leave you wanting more!

Our Spicy Citrus Salmon Salad is our go-to weekend late lunch, and we can’t wait to make it!

Makes a salad for two

40 minutes (not including the marination time) 

What you’ll need

Salmon Marination

  • One salmon fillet (125g
  • 90g red chilli (approx. 3 pc)
  • 1 clove of garlic
  • 1 tsp dried sage 
  • A pinch of Salt
  • 1 tsp chilli flakes 
  • 7 Tbsp olive oil (approx. 100g)
  • 4 Tbsp chilli oil (approx. 60g)
  • Juice of Half Orange (approx. 100g) (from the Fruitful Day box)
  • Zest of 1 Orange (approx. 10g) (from the Fruitful Day box)

Salad Ingredients

Mix all ingredients (except salmon) and blend into an oily paste—Marinate salmon for 3 hours or overnight. 

  • A handful of washed bean sprouts (90g)
  • 2/3 cup fennel (350g)
  • Tbsp coconut oil 
  • 3 Tbsp olive oil 
  • 1 Tbsp sesame oil 
  • Juice of one lime (from the Fruitful Day box)
  • A pinch of salt
  • 2 tsp chilli powder
  • A pinch of sage
  • Roasted peanuts 1 Tbsp
  • A handful of washed spinach (450g)
  • grapefruit cut into segments (645g) (from the Fruitful Day box)
  • mandarin cut into sections (350g) (from the Fruitful Day box)
  • A handful of green beans (90g)
  • A knob of butter (40g for pan Searing)
  • A small bunch of coriander (10g)

Method

  • Remove the salmon from the fridge so it can come to room temperature. 
  • Slice fennel thinly and place in a bowl with sage, olive oil (1 Tbsp) and salt. 
  • Bring a pan to medium heat, add coconut oil and sear for one minute. Set aside. 
  • Split beans in half vertically and blanch in a pot with boiling water for 3 min. Set aside. 
  • Mix olive oil (2 Tbsp), sesame oil, lime juice, and chilli powder in a small bowl to make the dressing. Set Aside.
  • Bring a skillet to medium / high heat and sear the salmon skin side down for approximately 5 minutes. 
  • Lower the heat, flip the salmon and add butter to the pan to baste the salmon for approximately 30 seconds. Remove from pan and let rest.
  • Mix all remaining ingredients and toss with 90% of the dressing.
  • Add salmon to salad and pour the remaining dressing on top.

Halloumi & Cherry Tomato with Pomegranate Molasses

We’d like to wish you all a Happy New Year and share with you our first recipe of the year! 

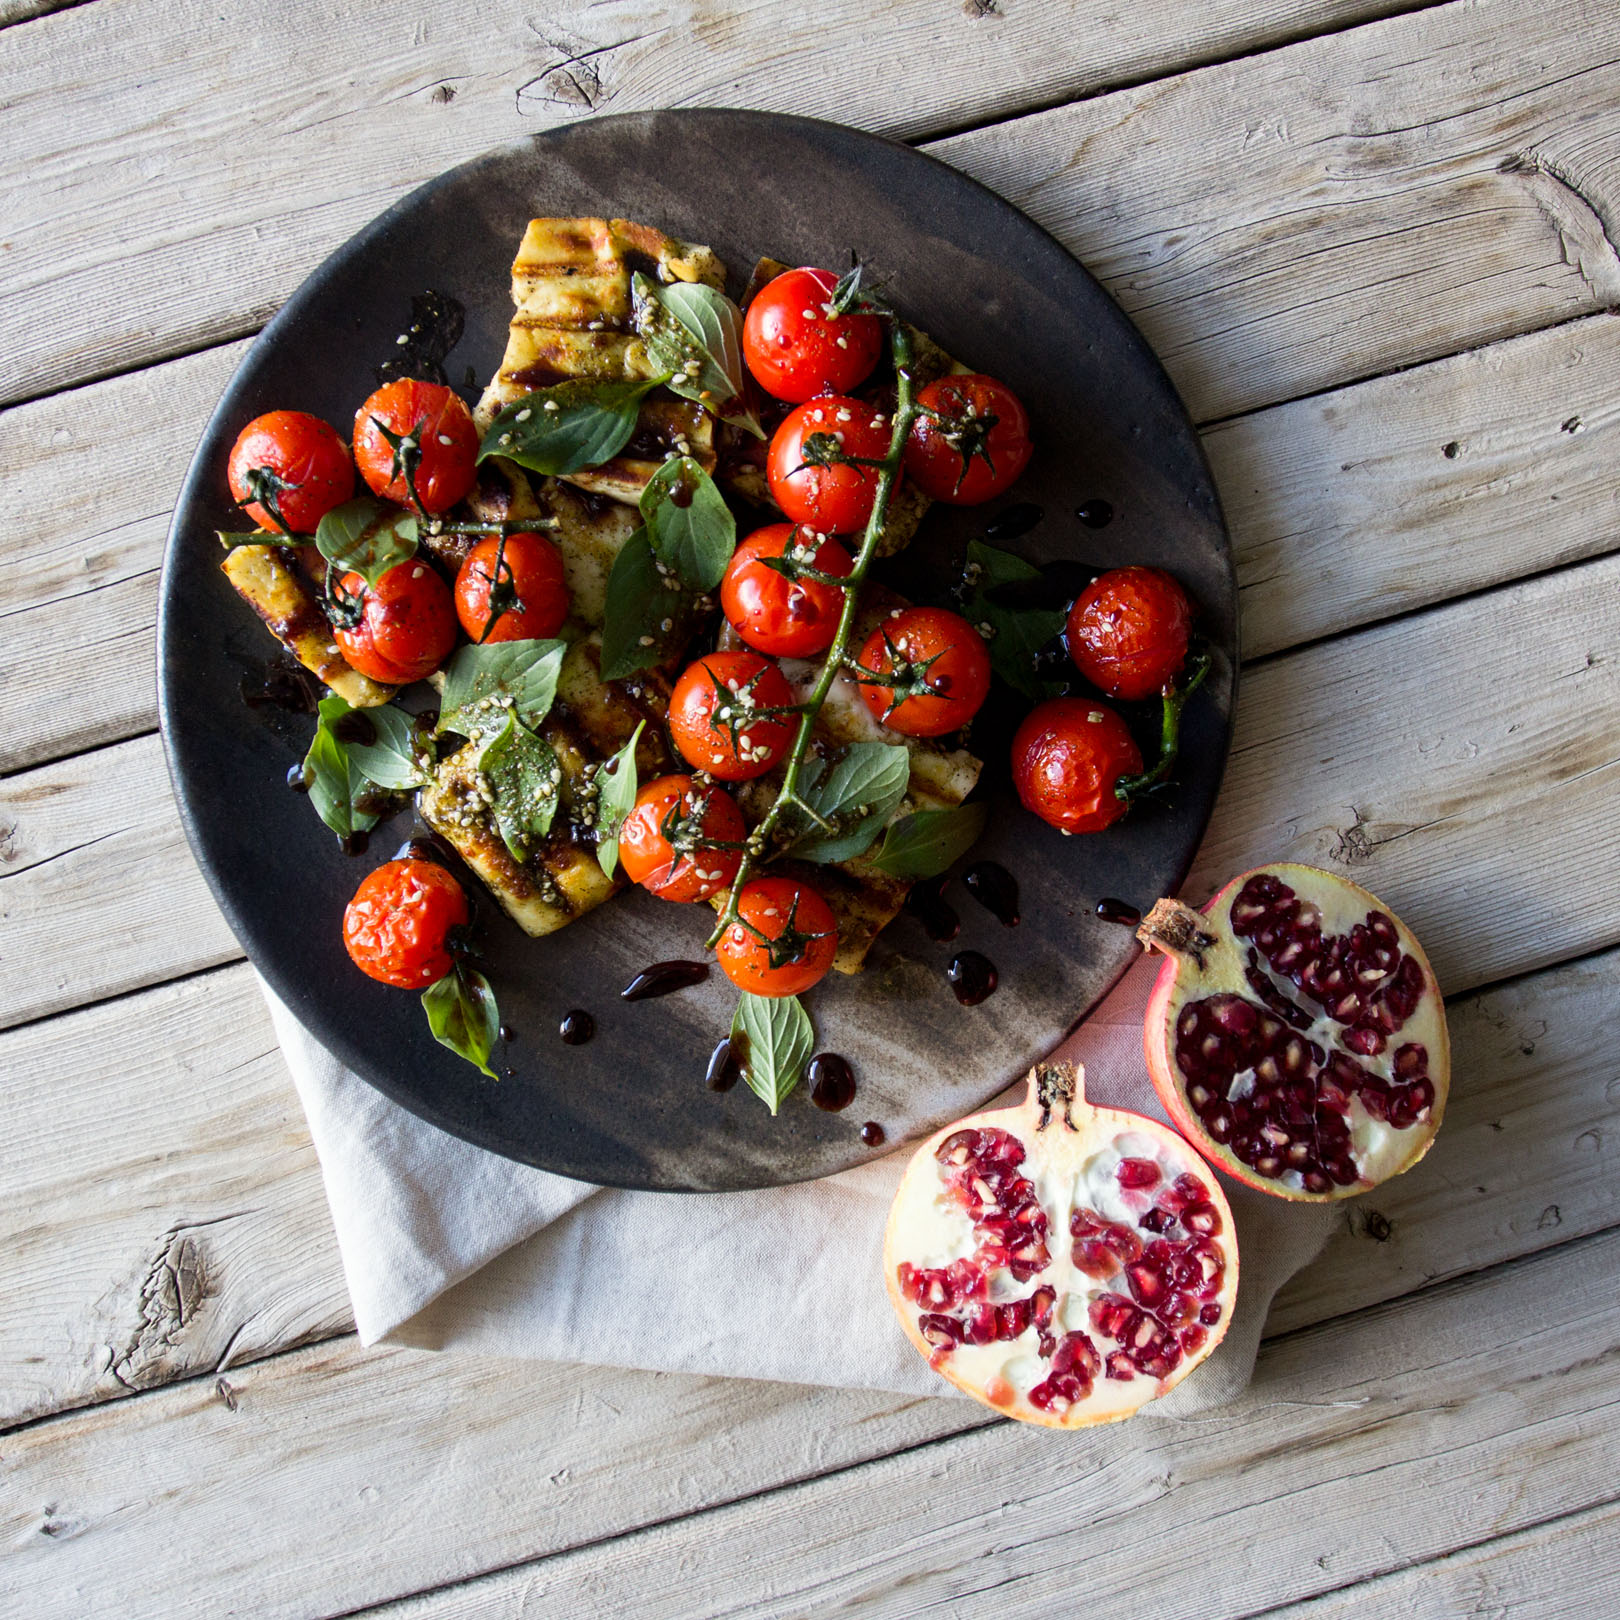
Halloumi & Cherry Tomato with Pomegranate Molasses

Not only is it easier to make than expected, but it would make an impressive DIY gift in a cute jar with a label, and can be used for many applications beyond just a salad!  (makes enough for an appetizer for 4)

Ingredients for the salad

1 hour (including making the molasses)

  • One vine of cherry tomatoes (approx. 16 cherry tomatoes)
  • Eight slices of halloumi
  • One handful of basil leaves
  • Two tablespoons olive oil
  • Two tablespoons of zaatar
  • A pinch of salt

Ingredients for the pomegranate molasses

  • 1/12 – 2 cups of pomegranates from the Fruitful Day Box
  • ¼ cup of coconut sugar
  • 3 tbsp lemon juice

METHOD for the molasses

1. Put the pomegranate seeds through a juicer to extract the juice. Alternatively, (if you don’t have a juicer) you can blend the seeds and then pour through a strainer.

2. Place pomegranate juice, lemon juice and coconut sugar in a medium saucepan on medium heat. Bring to a simmer and then turn down to a very gentle simmer.

4. Let the juice simmer very slowly for up to an hour. It should reduce down by at least half. Once it begins to become more viscous, stop simmering. Bear in mind it will thicken once cooled, so don’t over reduce as it will be too sticky.

METHOD for the salad

1.Preheat oven to 180 degrees C.

2. Slice the halloumi into 8 slices about ½ a cm thick and 8cm long. Marinate them in 1 tablespoon zaatar, one tablespoon olive oil and salt.

3. Place the tomatoes (still attached to the vines) on a baking tray. Mix one tablespoon olive oil, one tablespoon zaatar and salt and pour over the tomatoes. Bake for 10 – 15 minutes.

4. While tomatoes are baking, put a skillet on medium heat.

5. Place the halloumi slices on the skillet and cook for several minutes on each side.

6. Assemble the halloumi and tomatoes on the plate. Add the basil. If necessary sprinkle with more salt, zaatar and olive oil.

7. Using a spoon, garnish the whole dish with the syrupy pomegranate molasses.

8. Enjoy!

Ginger Spiced Cookies

‘Tis the season!’

What is Christmas without ginger-spiced cookies? And, if you’re planning on baking up a batch this Christmas, we’ve got the perfect festive recipe for you! These cookies are gluten-free, dairy-free (if you sub butter for coconut oil) and refined sugar-free, yet they taste and look very festive! You can garnish with anything from nuts (pistachios would look great), rose petals to dehydrated raspberries. You can also sub the hazelnut flour for any other nut-based flour and change the spices/omit the ginger for different flavouring options.

Ginger Spiced Cookies (makes 12 large cookies)

1 hour (depending on whether you have hazelnut flour)

Ingredients for the cookies

  • 2 cups hazelnut flour (To do this roast the hazelnuts in the oven at 180 degrees C for 5 – 8 minutes. Remove from the oven and put in a dishcloth. Rub the nuts around in the cloth. This agitates them enough so that the skins peel off. Then process the nuts in a food processor until they are of a flour consistency.)
  • ¼ cup of coconut sugar
  • 50g grass-fed butter
  • 2 eggs
  • 1 tsp baking powder
  • A pinch of salt
  • 1 tsp vanilla essence
  • 2 tbsp grated ginger

Ingredients for the garnish

  • 70g dark chocolate
  • 1/3 cup goji berries
  • 1 tbsp desiccated coconut

METHOD

1. Whisk dry ingredients together in a large bowl; hazelnut flour, coconut sugar, baking powder and salt. Keep the oven on after making the hazelnuts.  

2. In order to get the ginger really fine, blend it in a high-speed blender with the eggs. This helps the ginger flavour infuse more evenly rather than having chunks of ginger that can happen when you just leave it grated.

3. Add the wet ingredients to the dry; grass-fed butter, eggs and ginger mixture and vanilla essence.

4. Place this mixture in the fridge for 20 minutes until it’s firmed up.

5. Roll the mixture into 30g (approx.) balls. Place balls on the baking tray and press down with fingers until each one is 6cm/7cm in diameter.

6. Bake for 10 – 15 minutes or until browned.

7. Let cookies cool on a cooling rack.

8. In the meantime, chop the chocolate into smaller pieces and melt in a glass bowl placed over a saucepan of simmering water.

9. Dip half the cookie into the chocolate and place back onto the baking paper.

10. Sprinkle goji berries and coconut onto the melted chocolate. Set in the fridge.

Pear Loaf

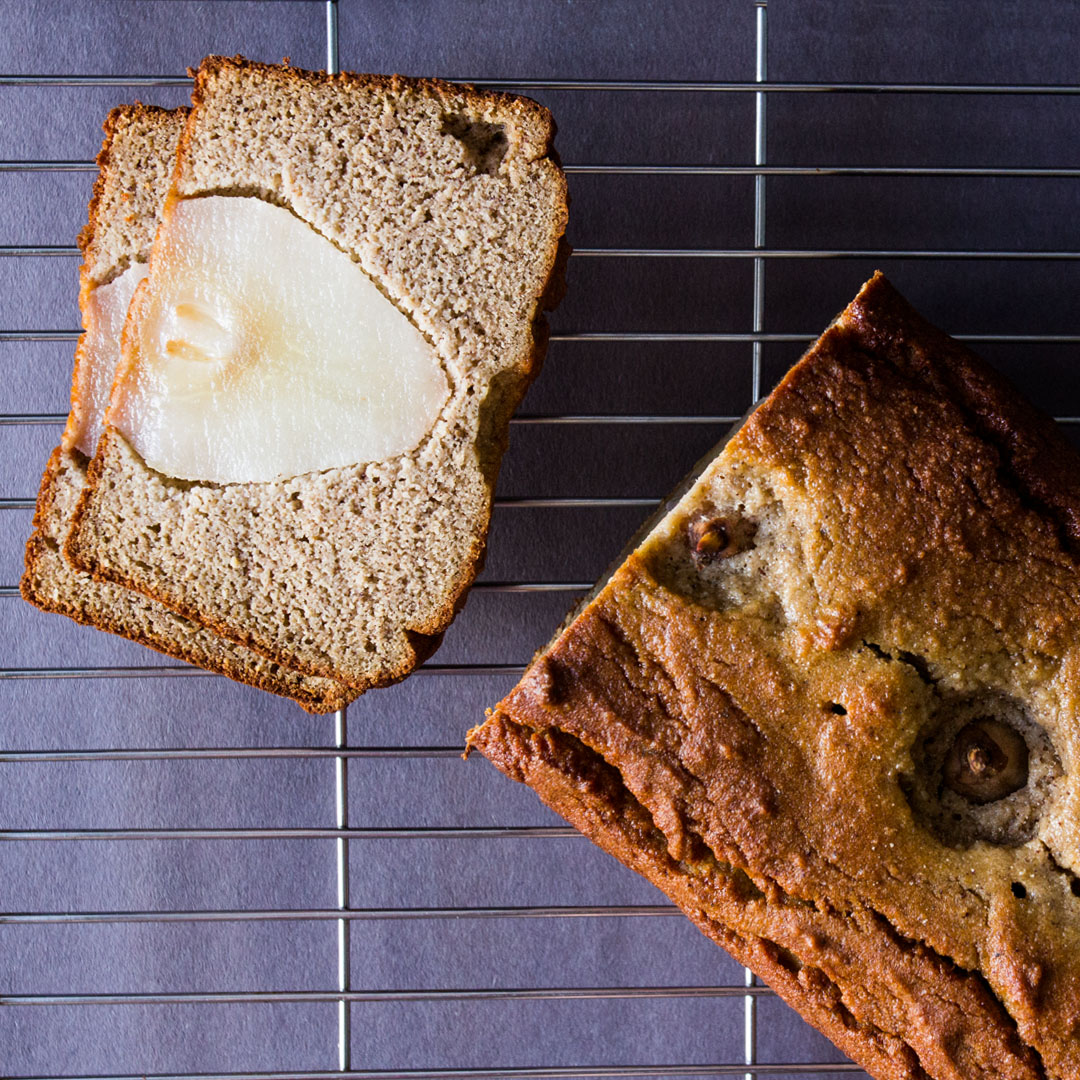
With a slather of grass-fed butter (healthy fats), this could be a great breakfast bread. It’s also ideal for kids’ lunchboxes as it’s nut-free! You could omit the honey, making it purely sweetened with pears. There is also an option to add collagen to the bread for bone, hair and nail strength.

Pear Loaf

Estimated 1 ½ hours

Ingredients for the loaf

  • 5 eggs
  • 1 chia egg (1 tbsp ground chia seeds + 3 tbsp hot water mixed well)
  • ½ cup coconut flour
  • ¼ cup gluten-free flour
  • 1/3 cup coconut oil
  • ¼ cup pasture-raised collagen powder (optional)
  • 2 tbsp honey
  • 2 tsp vanilla powder
  • 1 tsp apple cider vinegar
  • 1 tsp cinnamon
  • 1 tsp ginger
  • ¼ tsp salt
  • ½ tsp baking powder
  • 1 cup chopped pear from the Fruitful Day Box
  • 3 whole pears from the Fruitful Day Box (for inside the loaf)

METHOD

1. Preheat the oven to 180 degrees C and grease and line a 12cm x 22cm loaf tin.

2. Peel, core and chop enough pears to fill one cup – approximately 2

3. Place on a baking tray with some coconut oil and bake for 20 – 30 minutes or until soft (if your pears are ripe enough, you can skip this step!)

4. Put the pears into a food processor with the eggs and chia egg. Process until combined.

5. Add all remaining ingredients blend thoroughly.

6. Pour into a loaf tin and bake for 45 minutes. Keep an eye on the loaf and if it becomes overly brown on top, cover with tin foil for the remainder of the baking time.

Paleo Strawberry Shortcake

You’re going to love how easy this paleo strawberry shortcake is! With the use of almond flour, it allows you to indulge in a guilt-free dessert, and who doesn’t love that?!

Most gluten-free shortcakes recipes use ingredients that aren’t much better than wheat flour and white sugar. Our shortcake recipe uses more nutrient-dense ingredients such as almond flour. Almond flour is free of gut-irritating thickeners which include xanthan gum, corn starch and refined sugar. In this recipe, we substituted milk with coconut milk. However, we kept the butter because fat from grass-fed cow butter is full of beneficial fatty acids.

Once baked, the shortcakes go nicely with jam, yoghurt or ice cream. But, if you’re not a big fan of sweetness, you can always decrease the amount of coconut sugar and increase the nutritional yeast. They make for a great savoury biscuit and pair perfectly with gravy, soup or Chilli Con Carne.

30 minutes (makes 13 – 15 small shortcakes)

Ingredients for the cakes

  • 2/3 cup potato starch
  • 1 ½ cups almond flour
  • 1 tbsp tapioca flour
  • Pinch of sea salt
  • 2 tsp baking powder
  • 2 tbsp coconut sugar
  • 2 tsp nutritional yeast
  • 4 tbsp butter
  • ¼ cup of coconut milk
  • 2 eggs


Components for toppings

  • 200ml double cream (preferably from organic/free-range cows)
  • Strawberries from the Fruitful Day Box

Method

  1. Preheat oven to 180 degrees C.
  2. In a mixing bowl add the dry ingredients; potato starch, almond flour, tapioca flour, salt, baking powder, coconut sugar and nutritional yeast. 
  3. Whisk the eggs separately, set 1 tbsp aside, then stir into the mixture.
  4. Add the butter and start bringing the mixture together into a dough with your hands. Add the coconut milk slowly until the mixture comes along – you might not need all of it.
  5. Flour a surface with potato starch and handling the dough as little as possible, roll out until it’s about 1 inch high.
  6. Using a cookie cutter or bench scraper, cut the biscuits into circles or squares and then arrange on a baking sheet lined with baking paper.
  7. Brush the tops with the egg wash set aside and then bake for 15 – 20 minutes. Remove from the oven and let rest.

Arrangement for the toppings

  1. Pour cream into a bowl and whisk with a hand whisk or handheld beater until it forms a whipped cream consistency that can be spooned or piped onto the shortcakes.
  2. Wash strawberries, remove stalks and slice into four slices. You can leave some the larger pieces for the top of the scone.
  3. Cut the shortcakes in half, spread or pipe cream onto the bottom half, add strawberries, cover with the top half and repeat.


Watermelon Fruit Roll-Ups

We can’t believe it’s October already! Halloween is around the corner and that means A LOT of unhealthy snacks. But…we’ve got a recipe up our sleeve that will fulfil your kid’s sweet tooth like no other.

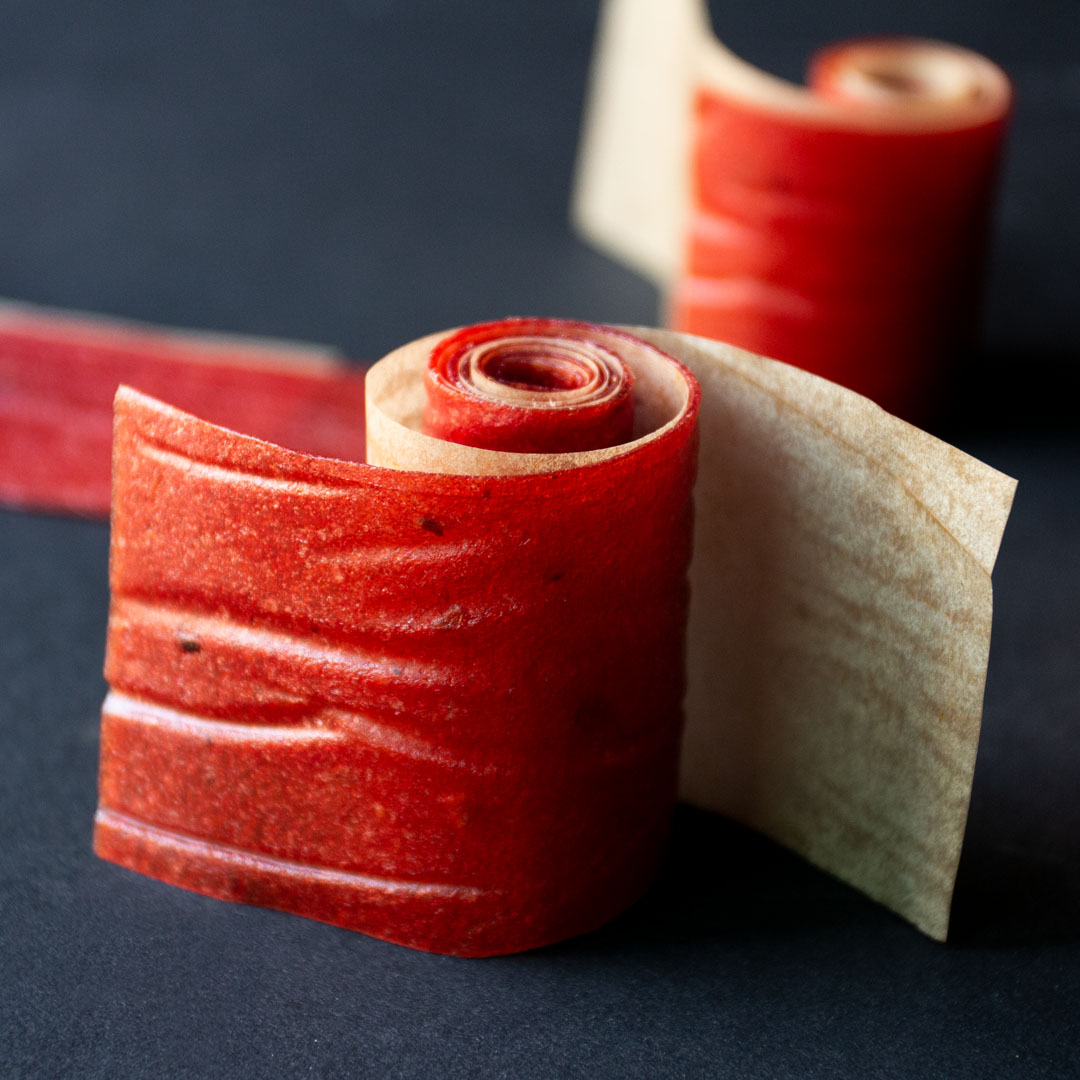
Our Watermelon Fruit Roll-Ups are an easy homemade snack. The first five ingredients in most popular store-bought fruit roll-ups are corn syrup, dried corn syrup, sugar, pear puree concentrate and palm oil.  In our case, we’ve ditched all the nasties and replaced it only with real fruit, coconut oil, and honey.

Why avoid corn syrup and palm oil?

  • Corn syrup is even more harmful than ordinary table sugar because of its high fructose content.
  • Palm oil is also a highly processed oil and is unhealthy for both us and the environment.

What about coconut oil? Is it good for you?

Coconut oil is often classified as a “superfood” because of its many benefits including:

  • Coconut oil is high in healthy saturated fats. These fats can boost fat burning and provide your body and brain with quick energy.
  • Coconut oil contains natural saturated fats that increase the good HDL cholesterol in your body.
  • Good for blood sugar and diabetes.
  • Aids in liver health.

So with just 4 simple ingredients, you’ll have the perfect healthy treat for your Halloween festivities! Happy trick or treating.


A delicious fruity treat


45 minutes prep + Up to 8 hours in the oven

INGREDIENTS

– 12 cups cubed and de-seeded watermelon

– juice of 1 lime

– 1 ½ tbsp honey

– 1 tsp coconut oil

METHOD

1. Preheat oven on the lowest temperature your oven will go with the fan setting on.

2. Chop and de-seed 12 cups worth of watermelon.

3. Blend watermelon until pureed.

4. Place a cheesecloth over a sieve and slowly pour the watermelon puree through both. You may have to stop halfway to stir gently with a spatula.

5. Keep stirring the watermelon puree until most of the water is drained and you’re left with a viscous watermelon mixture.

6. Line a sheet tray with baking paper and grease lightly with coconut oil.

7. Pour the watermelon mixture onto the sheet tray and spread with a spatula until it’s evenly spread and about 5mm thick.

8. Place in the oven and bake for up to 8 hours or until it’s dried and easy to peel off the baking paper.

9. Cut into strips with a pizza cutter or scissors and then roll up with a strip of baking paper.

Extra Tips

This recipe is fairly easy to make as it only involves blending, straining and then a long wait while it’s in the oven! However, de-seeding the watermelon takes some time so using fruit like strawberry or raspberry might be quicker. You can even put berries straight in the blender without worrying about the seeds.

Another thing to note is that if you have a dehydrator at home, it’s better to use that so your oven is not on for so long. It’s also safer to just leave on and go out for the day – the process is so slow and there’s little concern for overcooking. An hour either side won’t make much difference!

Watermelon Fries with a Sweet Yoghurt Dip

It’s been a few weeks since we posted our last recipe and we apologise! With the kids being back at school, and people are back from their summer holidays… let’s just say we’ve been a little busy. 

On that note, we wanted to give you some ideas to start the school year off on a healthy and happy note.

Finger Fruit, the perfect little bowl of goodness for back to school lunches or simply as a delicious snack. These watermelon fries are all we can think about and we highly recommend them, especially with the sweet and zesty dip! Oh…did we mention that it’s super easy to make?

Without further ado, we wish you a fruitful start to the new school year and hope you enjoy our latest recipe!


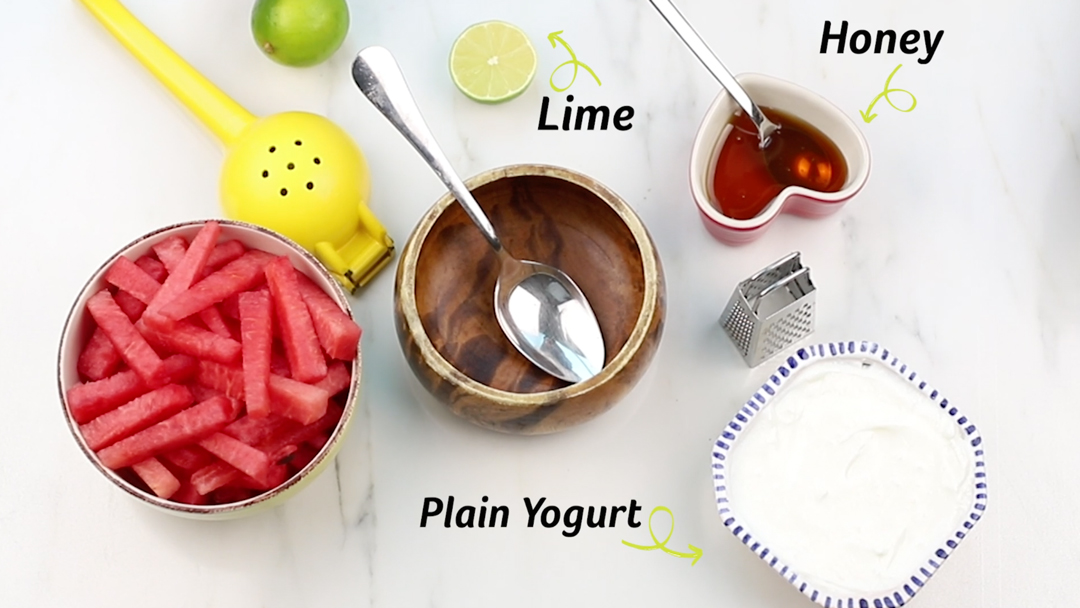
INGREDIENTS 

Half a watermelon is essential (haha/wink)

Plain yoghurt

1 lime

A spoonful of honey (or as much as you want)


Makes1 serving 


Cut watermelon into long fry size wedges (2cm wide) 

Mix ½ cup yoghurt with a spoon of honey, ½ a lime and lime zest. 

You can also add vanilla or cinnamon for more flavour. If you have a picky eater, you can simply add honey to yoghurt.


And…enjoy!

Peach Salsa

It’s crazy to think that the summer is almost behind us! We hope that you’ve had an amazing time whether you were here in the UAE or traveling the world. At Fruitful Day, we always look forward to the summer as it’s when stone fruit is in season and we get the most delicious peaches, nectarines, and apricots from the region.

Before summer escapes us, we wanted to share a recipe that is easy to make and super delicious poolside snack. A twist on a classic tomato salsa, a peach salsa is a great way to eat seasonal. Make a batch, store it in the fridge and avoid all the sugar, preservatives, and dehydrated vegetables in the the store bought version.

If you’re eating your peach salsa with tortilla chips, read the ingredient label before selecting which bag to buy. Most corn tortilla chips are made using highly processed oils, however, some brands use better quality oils like coconut oil. Look out for Non-GMO, organic corn chips. You may even find some brands which are made with sprouted grains such as millet and quinoa and are a great alternative to regular corn tortilla chips. You can also skip the chips and serve it over fish or chicken, added to burrito bowls or used as a garnish on tacos!

We hope you love this recipe as much as we do and check back soon as we have some great back-to-school recipes coming soon.

Peach Salsa (makes two small bowls)  

Preparation time: 30 minutes

Ingredients

  • 5 peaches and/or nectarines
  • 5 shallots
  • ½ red bell pepper
  • 1 handful of coriander
  • Juice of 2 limes
  • Salt & Pepper to taste
  • ¼ tsp smoked paprika

Method

  1. Pit and dice all peaches and nectarines.
  2. Peel and dice the shallots.
  3. De-seed the bell pepper, cut in half and then dice one half only.
  4. De-seed and then finely dice the two green chili’s.
  5. Wash and finely chop the coriander.
  6. Add all the prepared ingredient to a bowl.
  7. Squeeze a two limes and add to the bowl.
  8. Add salt, pepper and smoked paprika until fully incorporated.